As a scale modeler I started like most of my peers with a variety of old fashion stick type paintbrushes to paint my models. Even today there are some aspects of scale model painting that require the use of a paintbrush. Before I really mastered the stroke of a paintbrush I was introduced to painting my models using spray cans of paint. What a time savings and a more realistic appearance (no brush marks) they provided.
Scale model painting with aerosol cans wasn’t without its challenges. Color consistency between cans of the “same color” often were not the same. No two cans ever sprayed the same because the dispensing nozzle atop the cans varied in spray pattern and volume. Some seemed to apply paint in a ring pattern while others shot a direct stream. When one found a good nozzle – one that sprayed in a vertical fan pattern – you carefully removed and cleaned it. Then you held onto it in case the next can of the same brand was ‘wonky’ too.
A limitation of aerosol painting is the limited color selection. Yes, there are a lot of colors available, but not necessarily the colors you need for the subject you’re modeling. Today however, some companies are expanding color choices and providing a reusable aerosol dispenser. Its pricey though, and it still applies paint like an aerosol can.
From Aerosol to Airbrush
Airbrushes, back in the day (when I was a kid), were something only the most advanced modelers used. Airbrushes were not easily accessible nor were they affordable to a teen on an allowance. Today however, airbrushes are readily available at various price points, quality, performance and styles.
Like most modelers of my generation, I progressed from brush to aerosol, to airbrushes for scale model painting. Each is an art form with its own learning curve to master, to produce realistic looking finishes.
I own a few…probably more than most, but I started out with a very simple airbrush that I received for Christmas from my parents. It was a Sears setup that really didn’t work well, a single-action, siphon-feed cheapo, with a compressor that had no regulator or moisture trap. It spit and splattered paint everywhere. I’ve hung onto it for decades, but never used it since.
Airbrushes became standard fare for me once I got my hands on a good one with the proper system to provide the air it needed to function properly. As a small, niche paint manufacturer, I acquired a wide selection of types and styles in order to answer performance questions regarding my paint products.
If a customer called who was having trouble with the “paint” I would pull the airbrush that matched theirs and we’d troubleshoot the problem they were having. 98% of the time it wasn’t the paint, but the owners lack of knowledge of using and maintaining their airbrush.
Airbrush Styles and Types
Airbrushes come in two distinctive groups: single-action and double-action.
- A single action airbrush works just like an aerosol spray can; you push the button and a mixture of paint and air exit the nozzle.
- A double action airbrush gives you, the operator, control over both air and paint flow; you can vary both into a combination that suits your requirements.
Airbrushes require a paint reservoir and come in three feed types: side, siphon or gravity-fed. Think of a siphon as a drinking straw in a bottle of soda and gravity as pouring out the contents of a bottle of soda. A side-fed setup uses a form of either siphon or gravity depending on the paint vessel supplying the airbrush.
Pencil or Trigger-Pull
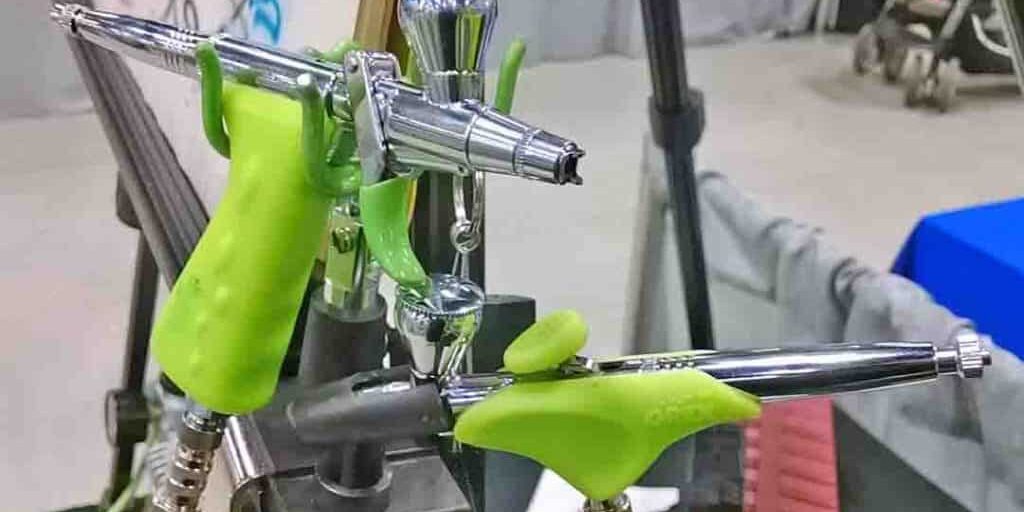
The human hand is familiar with holding a pencil or pen and that was the design used for airbrushes…pencil style. A pencil style airbrush has a pencil shaped barrel or handle, with a push button on top actuated with your index finger. On a single-action you simply push down. On a double-action you push down to start the flow and control the volume of air, then rock that same button backward to start and control the flow of paint being expelled.
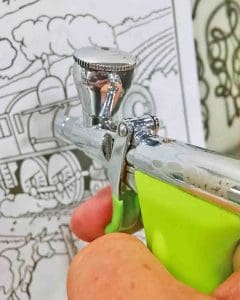
Today we’re seeing trigger-pull airbrushes (think of a pistol). These have their advantages, one being ergonomics. If you have dexterity issues with your fingers and hands, and using a pencil/pen to write has become increasingly difficult or uncomfortable, controlling a pencil style airbrush will be more difficult.
From Customer to Scale Model Painting Ambassador
I currently serve as an Airbrush Ambassador for Grex Airbrush, demonstrating their products and sharing tips, techniques and answering airbrushing and paint-related questions. I was a long-time customer of the line before I took up the Ambassador role.
One of the most common questions people ask is, “Should I start with an easy to use single action?” My answer to that is no. As with any other tool, you can master a double-action airbrush with practice. I like to use the example of a hammer: If you’re going to build a shed, do you go out and buy a “kiddie hammer” or do you buy one suited to the tasks you’ll be using it on now and in the future? Sure, you may hit your thumb a few times, but with practice you’ll master that hammer and it will become an extension of your hand.
Airbrush Quality Considerations
When it comes to airbrushes and airbrush supplies and accessories, cheap usually isn’t good. You can find cheap yet functional airbrushes on the market, but if you have any problems with them you’re most likely not going to find support or service for them. This often means you’ll probably be spending more of your money for a replacement. So, get something that will last, a product that can be serviced from a manufacturer who provides support.
Airbrush Cleaning
The most critical part of using an airbrush is cleaning it afterwards. It’s a precision apparatus and it has tight tolerances, so cleanliness is key to its proper functioning. This is probably the second most asked question about any airbrush: “How easy is it to clean?”
I like to use Xuron’s #860 Dispensing Bottle to help clean my airbrushes. This is a perfect companion for your airbrush, regardless of type or make, and I keep several on-hand. The #860’s applicator needles allow you to get deep inside the body of your airbrush or its components with cleaner or solvents. This will help you remove stubborn residue that builds up during longer painting sessions. You’ll find them handy whether filled with water, cleaning solution, or even for mixing up batches of paint for quick airbrush refills.
At events where we demo, such as the upcoming Rocky Mountain Hobby Expo, I use one dispensing bottle filled with water to thin down acrylic paints, and another filled with solvent to give the airbrushes a quick cleaning between colors.
A Word About Accessories
Many manufacturers offer cleaning tools for their airbrushes, such as bore brushes that are used to clean narrow chambers and passages inside the airbrush. There are a lot of “look-alikes” out there and they are NOT created equal.
At a show where I was demonstrating, a customer opted not to buy a $5 set of cleaning brushes. He instead went to one of those bargain tool bins at another vendor and bought a “look-alike” set. A few weeks later he called me to ask me for help. It seems the cleaning brush was stuck inside his airbrush. The bristles on the look-a-like were not friendly with the solvent he was using to clean his airbrush. The bristles melted and welded themselves into the core of his airbrush while he was cleaning it, sort of like forcing too large of a patch cloth down the barrel of a gun. It got stuck and the more he tried to push or pull the tighter it got. His savings of two bucks ended up costing him a whole lot more.
Practice Before Painting Your Masterpiece Model
One mistake most beginning or returning airbrush users make is failure to practice or re-familiarize oneself with the airbrush prior to applying paint to something they’ve built. A perfectly assembled model can be ruined in seconds if the modeler isn’t competent or proficient with the airbrush in his hand.
 I suggest that you use a coloring book and food coloring to acclimate yourself with the airbrush. Food coloring is found in your local grocery store’s baking supplies aisle. It’s cheaper than hobby paint, odor free and cleans up with dish soap and water. By spraying it onto a coloring book you can practice various techniques, make adjustments to the air and paint flow of the airbrush, and experiment with distance between the airbrush and page, perfecting your skill set before painting your model.
To get a three-dimensional shape, tear out a page and wrap it around the core from a roll of paper towels. You’ll now see how the paint spray pattern works when applying to curved surfaces. Practice makes permanent. Clean up is easy and you gain confidence with using the airbrush.
If you’re just starting out, purchase paints that are “airbrush ready” or those that can be applied straight from the bottle with no mixing or thinning. Paint thinning is a skillset in and of itself. We’ll talk about that in a future post. KISS … Keep It Simple and Straightforward: the best approach to learning any new modeling skill set including airbrushing. With time and practice painting with an airbrush will become second nature.


I would love to rack your brains about airbrushing I to am on a stick paint brush myself it’s ok but I’m ready to progress but don’t know how plz get back to me
First, visit the many airbrush manufacturers websites and learn about the different models/types they offer. I recommend starting with a double action as you’ll eventually end up with one and its easier to learn to master the tool you want to use. There are countless How-To Airbrush For Beginners videos on YouTube. You can attend seminars and classes at many of the larger scale modeling events. Your local hobby shop may even have someone they know who tutors or can refer you to a local club. Here is a link to a company whose product I use personally and represent, they have some good tutorials https://www.youtube.com/user/grextools/videos ~Gerald